From a Model-Style Image to a Photoreal House Render
A documented ReRender test using an AI-generated architectural model-style image, with exact settings, results and geometry checks.
What we tested
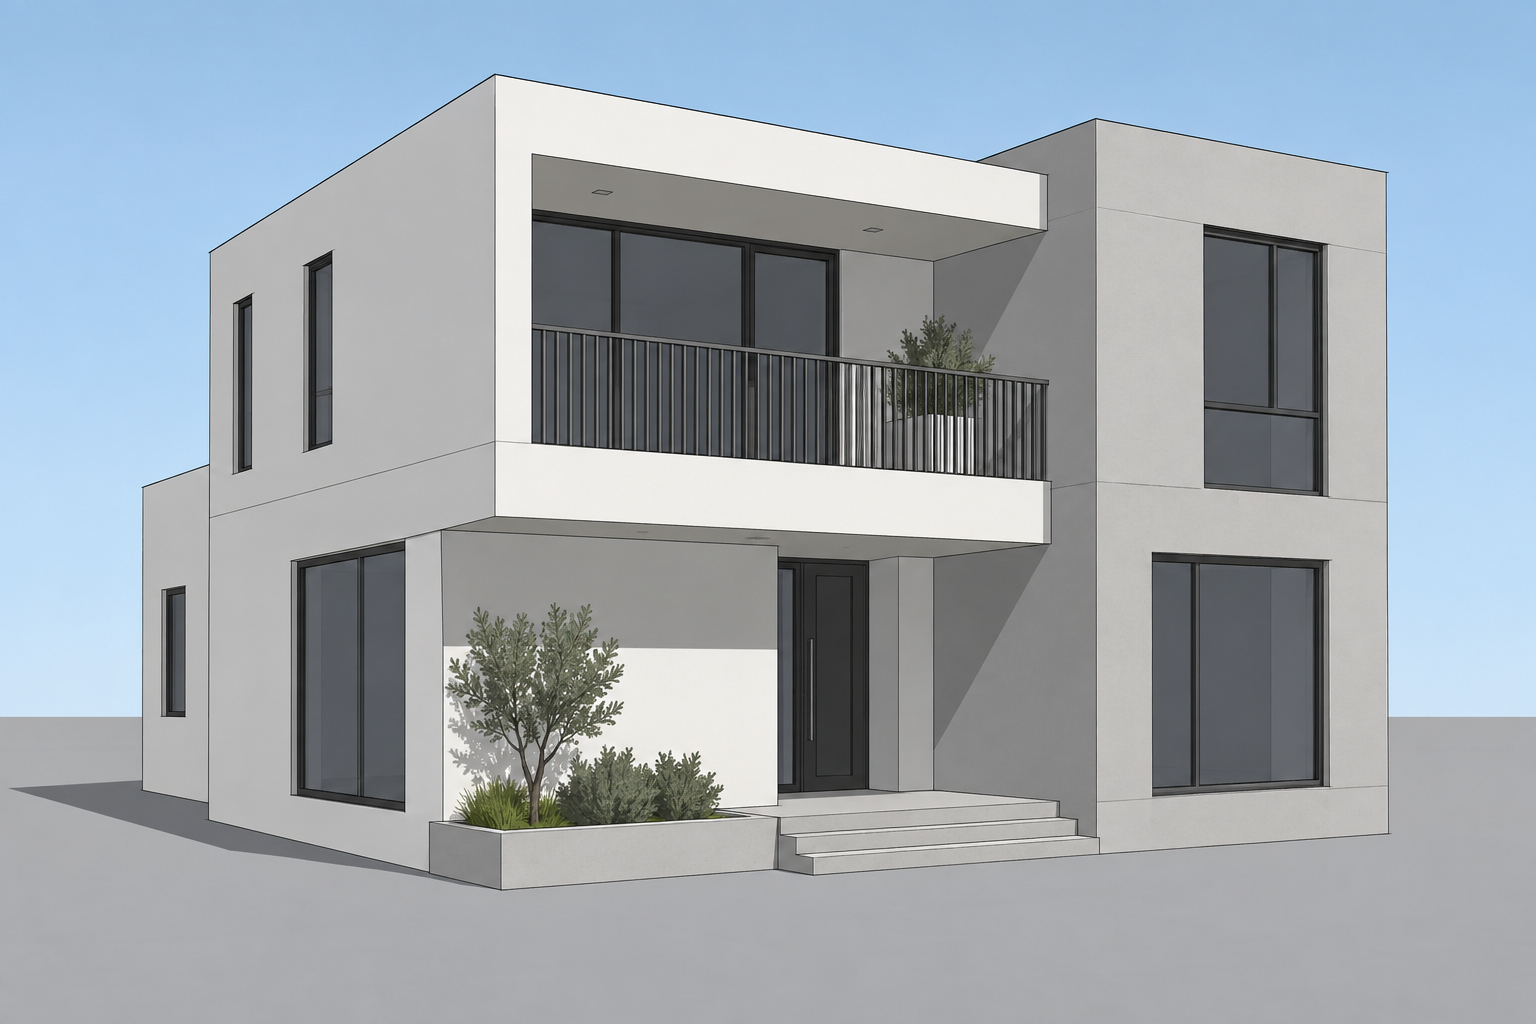
We ran the same house image through two live ReRender workflows on 14 September 2026. The input is an AI-generated raster image resembling a shaded 3D model viewport, not a SketchUp/Rhino export or a real client project. This is a worked demonstration, not a benchmark of the updated model against an older version.
Starting image
The two-story house includes a flat roof, balcony with vertical railing, recessed entrance, three steps and a planting bed. These provide visible details to check after rendering.
Test A: Fast Render with a precise prompt
- Open Render / Fast Render and upload the input.
- Choose Exterior → Single-Family → Sleek International.
- Select Precise. Leave Preserve Texture and Refine my prompt off. Leave the time, season, sky, landscape and material dropdowns unset.
- Enter the prompt below and click Render.
Photorealistic architectural photograph of this exact house in soft late-afternoon daylight. White mineral stucco walls, dark charcoal aluminum window frames and balcony railing, clear realistic glazing, pale gray stone entry steps and paving. Preserve the exact camera angle, roof silhouette, building proportions, every window opening, balcony rail arrangement, recessed entrance, three steps and planter footprint. Keep planting in the existing planters. No added floors, doors, windows, people, cars, signs or text.
The run returned four variations at 1264 × 832. The first output is shown here.
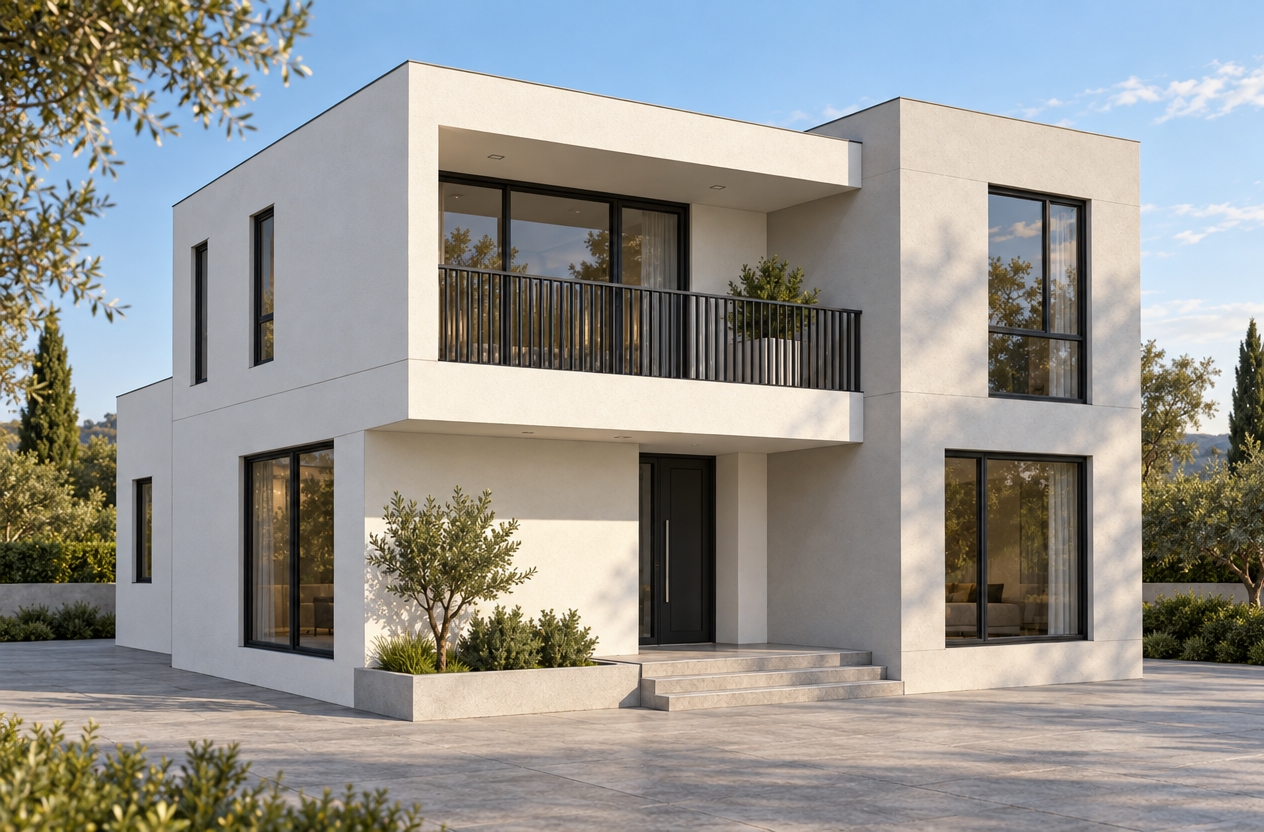
The main house shape, roof silhouette, balcony opening, window positions, entry and three steps remain visually close to the input. Flat materials become textured stucco, realistic glazing and stone paving with warm daylight. Fine glazing divisions differ, and surrounding trees, foreground greenery and interior details appear. The instruction to keep planting in existing planters was not fully followed.
Test B: 3D Model Rendering — Structure Optimized
- Open Enhance → 3D Model Rendering.
- Select Structure Optimized before uploading the same input.
- Upload the image; this starts rendering automatically. No custom prompt was entered.
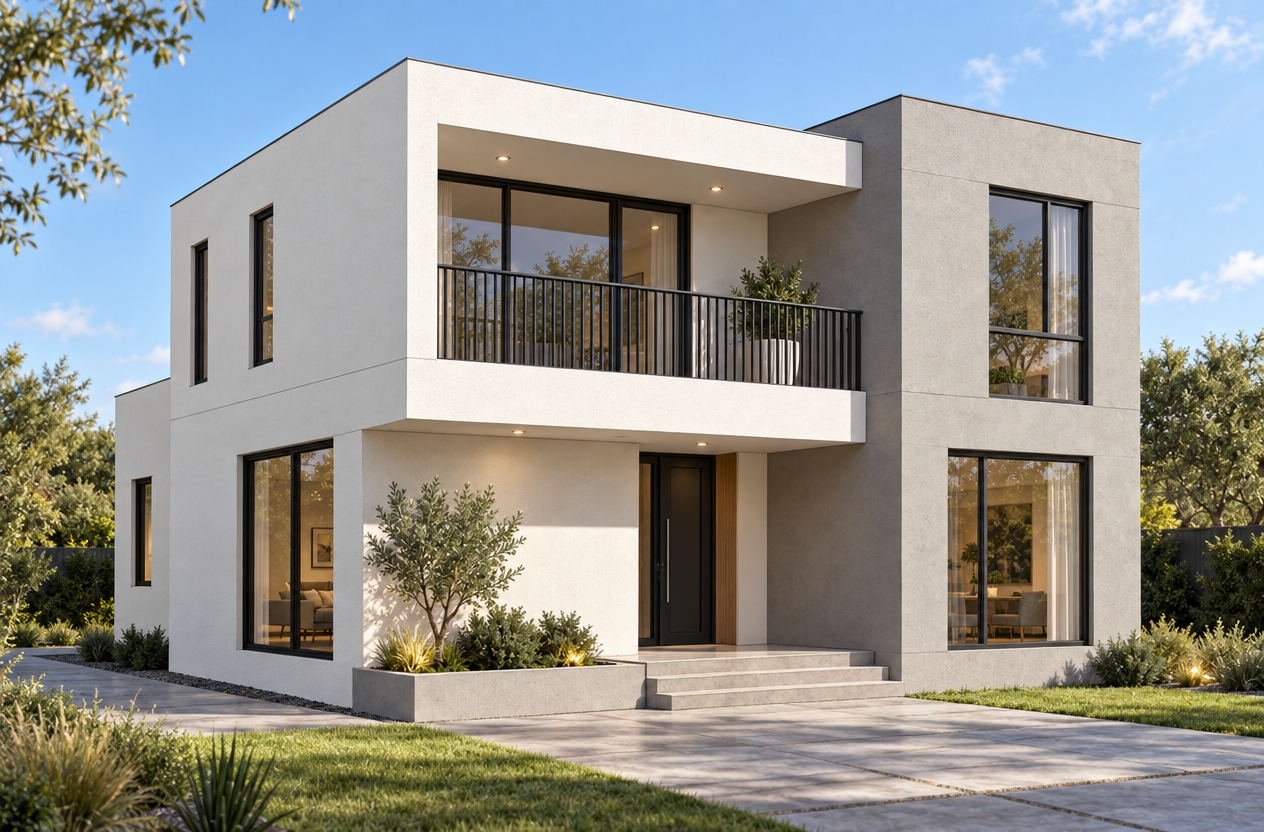
This run also returned four variations at 1264 × 832. The first output is shown below.
Open the Structure Optimized result
The inspected output retains the main house form, window locations, balcony, entry steps and planter visually. Wall texture, reflections and visible interiors make it feel more photographic. Lawn, additional planting and illuminated downlights were introduced. Fine window divisions and railing spacing still deserve review.
What this example shows
| Check | Finding |
|---|---|
| Overall composition | Both inspected outputs remain visually close to the source house and viewpoint. |
| Presentation quality | Both add convincing material detail, lighting and glazing. |
| Ease of use | Structure Optimized produced its result without custom prompt writing. |
| Fine details | Window divisions, railing spacing and small details should be checked against the source. |
| Added context | Both introduce landscaping and interior details beyond the flat model-style input. |
For this input, Structure Optimized is a useful low-effort starting point. Fast Render allows an explicit material and lighting direction. The settings differ, so this is not a controlled model comparison. The assessment focuses on the first output from each run; four variations per run do not establish general reliability. Neither workflow exposed a provider model version, and exact dimensions were not measured. We make no generation-time or improvement-percentage claim.
A second submission while the first render was queued was rejected with a wait message. It succeeded after the first run completed.
Before presenting a result
Compare roof edges, window divisions, railing details, stairs and planting with the source. Treat the image as a visualization and check any design-critical detail against your original model.
Suggested next test
Repeat this workflow with an actual model export, then test a facade with dense mullions or curved geometry. That will provide stronger evidence for day-to-day architectural use than one synthetic example alone.