How to Guide AI Design with Annotations
Learn how to use ReRender annotations and prompts to guide AI design results with clearer control over materials, lighting, viewpoints, and atmosphere.
Why use annotations for AI design?
In architectural AI rendering workflows, we often run into the same problem: writing a longer prompt does not always make the result more accurate. This is especially true when we only want to change a specific material area, control the light direction, or preserve a certain camera angle.
In this tutorial, we’ll use ReRender to communicate design intent through annotations. Instead of relying only on text, we will combine visual marks on the image with short prompts so the AI can better understand what should change and what should stay the same.
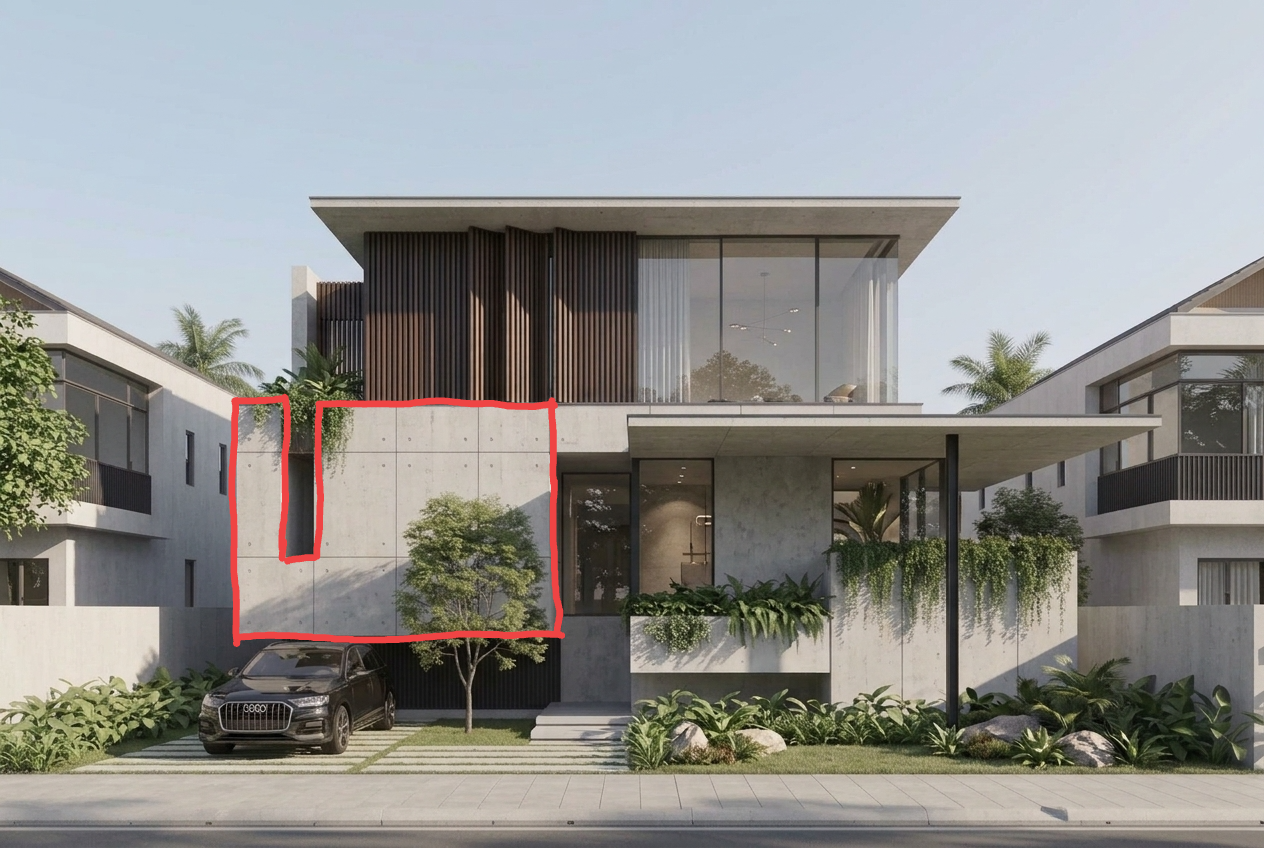 Figure 01. Using annotations to help AI understand editable areas and design intent
The key advantage of annotations is that they turn abstract instructions into visible areas and directions. When the AI understands that a red outline means a material replacement area, an arrow means sunlight direction, or a red arrow means the desired viewing direction, the output becomes easier to control.
Step 1 — Log in and prepare your image
First, log in to ReRender and prepare the image you want to edit.
This image can be a clay model, a SketchUp screenshot, an architectural rendering, or an early-stage concept image. Before uploading, make sure the main geometry, perspective, and design elements are clear enough for the AI to read.
If the input image is too noisy, heavily cropped, or unclear, annotations may still help, but the AI may have a harder time understanding the original design.
At this stage, the goal is not to write a complex prompt yet. We first need to prepare a clean base image where annotations can clearly point to materials, lighting, or viewing directions.
Step 2 — Go to Home and upload the annotated image
After logging in, go to the ReRender home page and upload your annotated image.
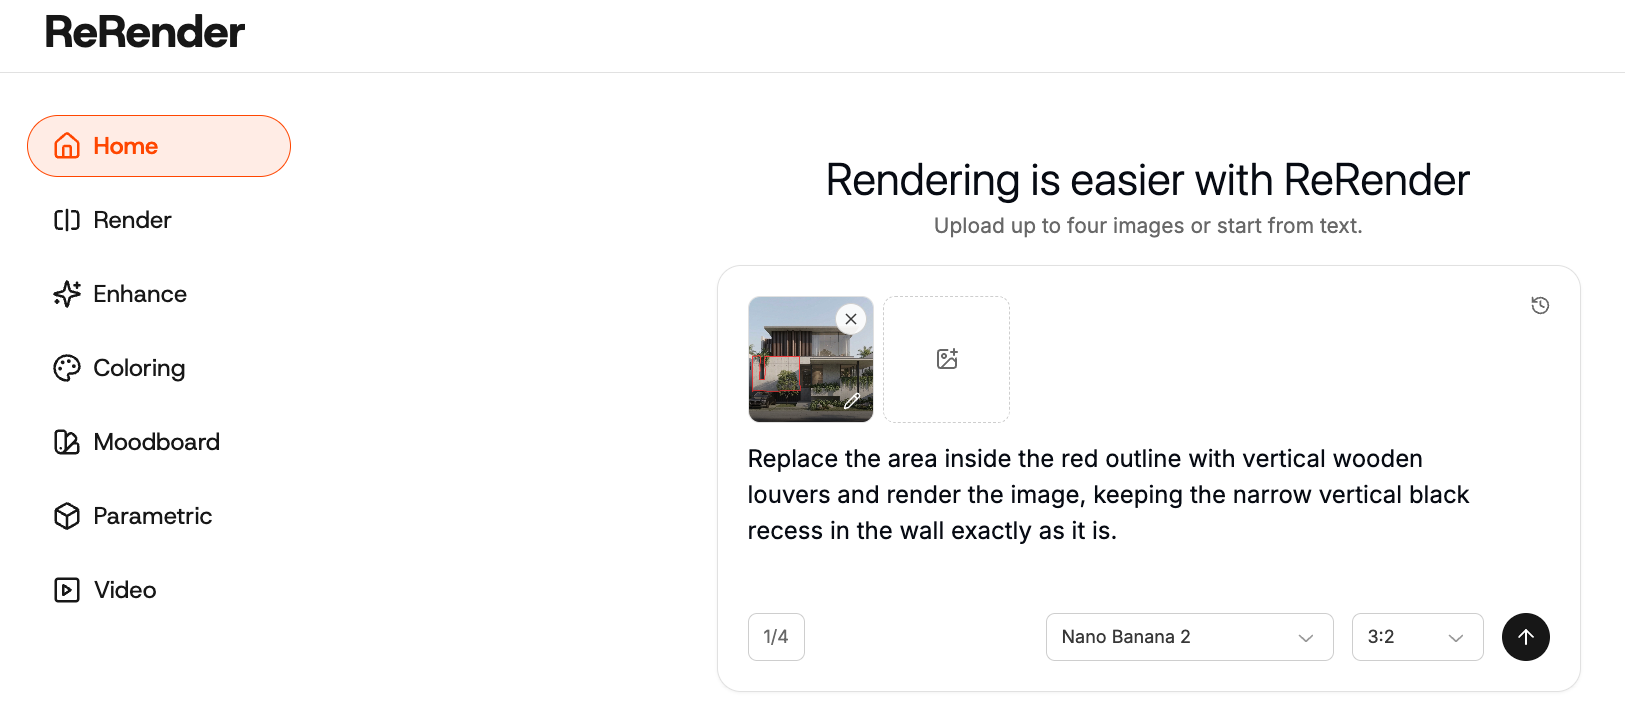
The annotation can be simple. For example, you can use a red outline to mark the material area you want to replace, write material names directly on the sketch, or draw arrows to indicate sunlight direction or camera direction.
The important part is clarity. Keep the annotations close to the target area, avoid overlapping arrows, and make sure the marks are easy to understand.
In most cases, a clear red outline plus a short prompt works better than a long prompt without any visual guidance.
Step 3 — Use red outlines to control material replacement
One of the most useful annotation methods is using a red outline to mark the exact area where the material should be replaced.
This works well for facades, walls, floors, roofs, cabinets, or facade panels. If the prompt only says “change the wall to stone,” the AI may not know which wall you mean. It may also change other areas by accident.
With a red outline, the editable area becomes much clearer.
Replace the area inside the red outline with vertical wooden louvers and render the image, keeping the narrow vertical black recess in the wall exactly as it is.
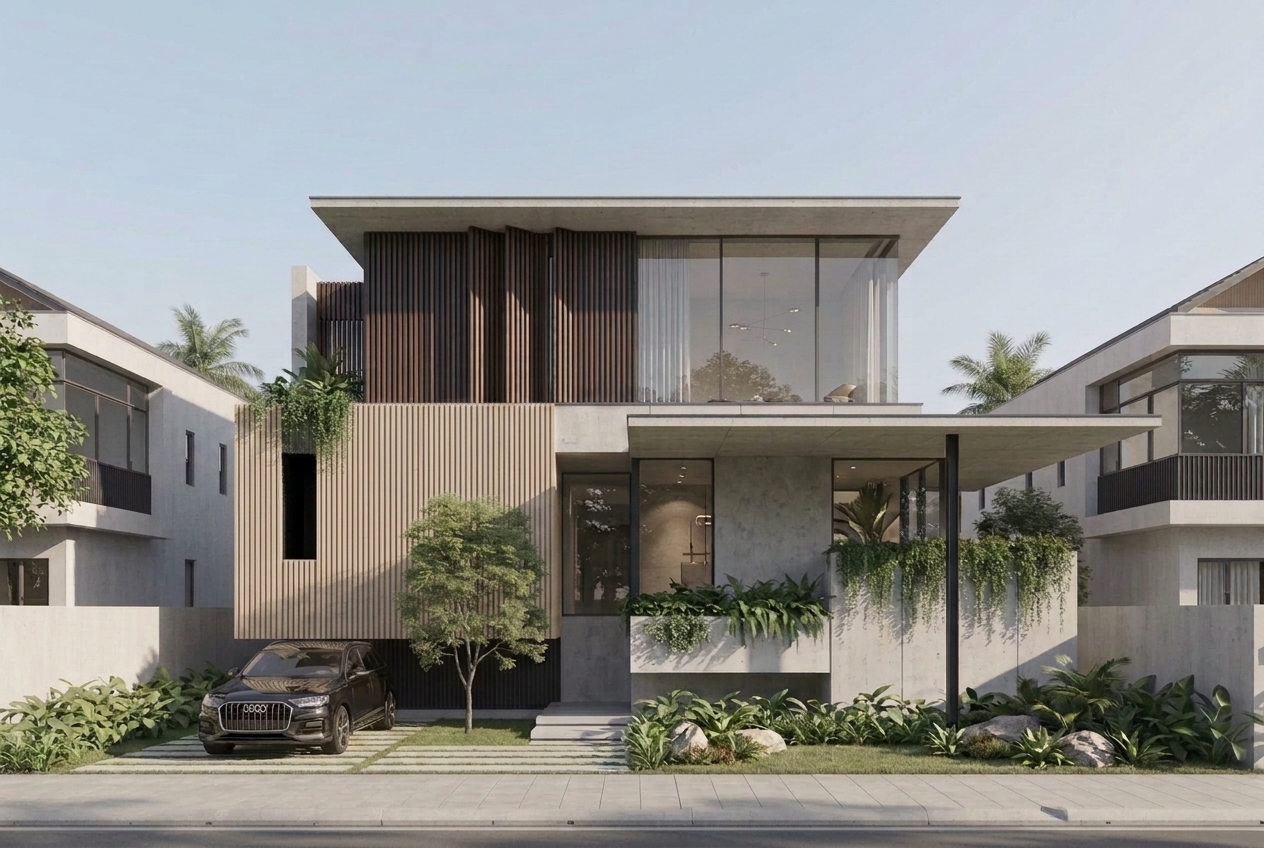 Figure 02. Using a red outline to specify the facade area for material replacement
The key here is not to describe the material in extreme detail. The more important instruction is to clearly define the editable area.
When the target range is clear, the prompt can stay shorter, and the model is less likely to modify parts of the design that should remain unchanged.
Step 4 — Label materials and design elements on the sketch
Another useful method is to write material names or element labels directly on the sketch or base model.
For example, you can label one wall as wood cladding, mark the ground as stone paving, or write shrubs in the planting area. This gives the AI more semantic information about each part of the image.
follow the material annotations in the image, render the wall as wood cladding, the ground as light stone paving, and the planting area as soft landscape, preserve the original massing and perspective
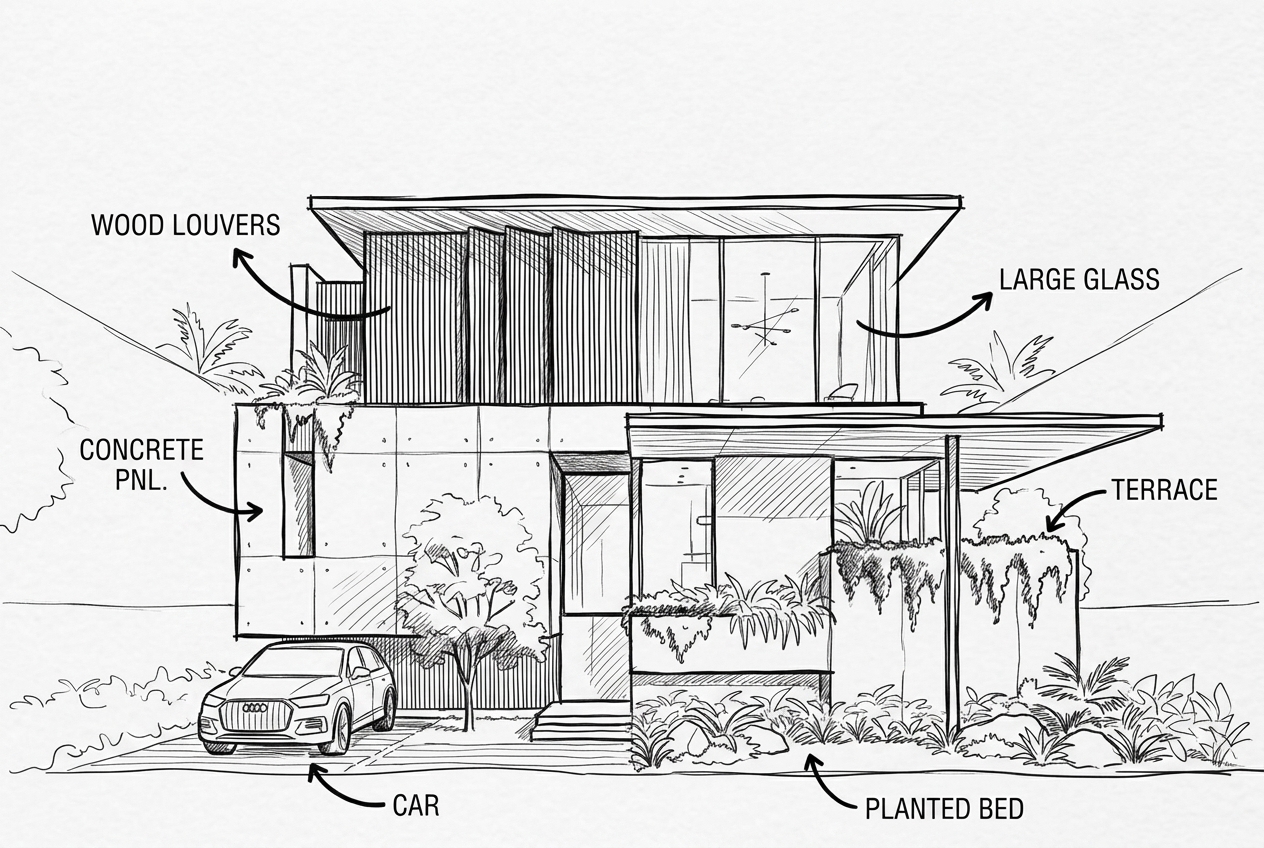 Figure 03. Labeling materials and elements directly on the sketch
This method is especially useful for early-stage proposals. Designers may not have complete modeling or material settings yet, but they often already know the intended direction for each area.
From our tests, annotations work better when the labels are close to the target area. If the labels are too far away or if too many arrows overlap, the AI may apply the material to the wrong place.
Step 5 — Use arrows to control sunlight and viewpoint
Annotations can also help control lighting.
For architectural and interior renderings, light direction affects shadows, reflections, material highlights, and spatial depth. If the prompt only says natural daylight, the AI will create a reasonable light setup, but it may not match the intended design direction.
By drawing an arrow on the image, we can show where the sunlight should come from.
use the arrow direction as the sunlight direction, create natural daylight from the upper left, soft shadows, realistic reflections, preserve the original design
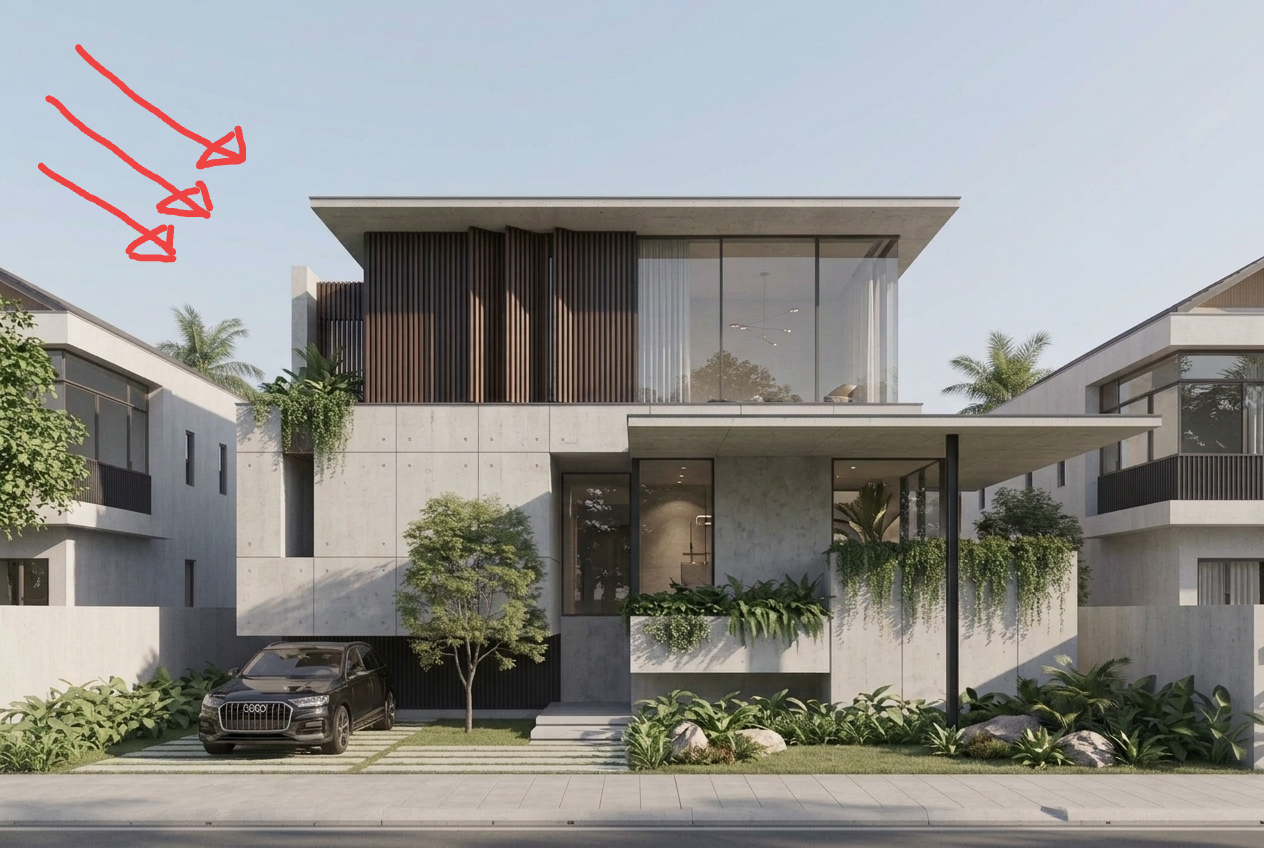
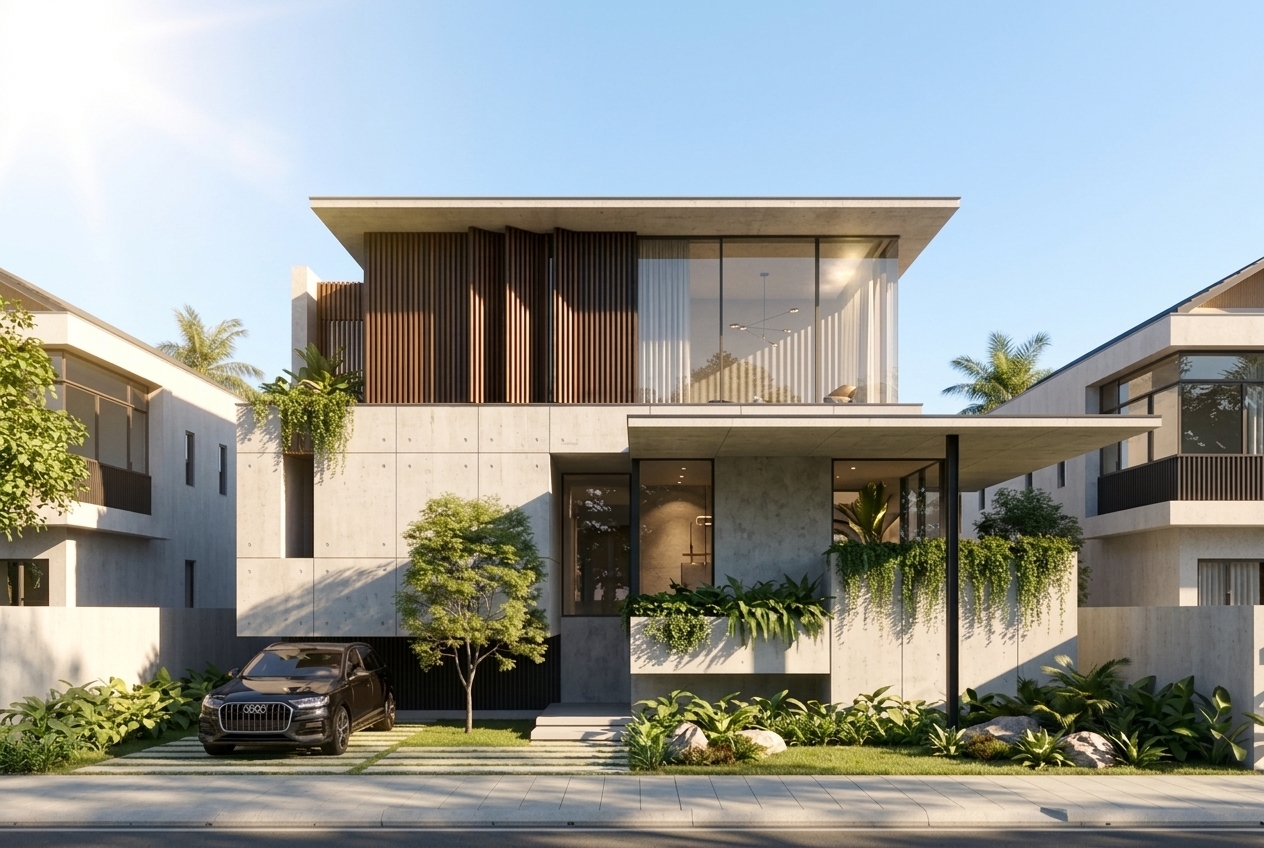
Figure 04. Using an arrow to specify natural sunlight direction
The same logic can be used for viewpoint control. If you want the AI to generate a new architectural view, use a red arrow to indicate the viewing direction and pair it with a short prompt.
generate a new architectural view from the red arrow direction, preserve the same building design, facade language, proportions, materials, and overall massing
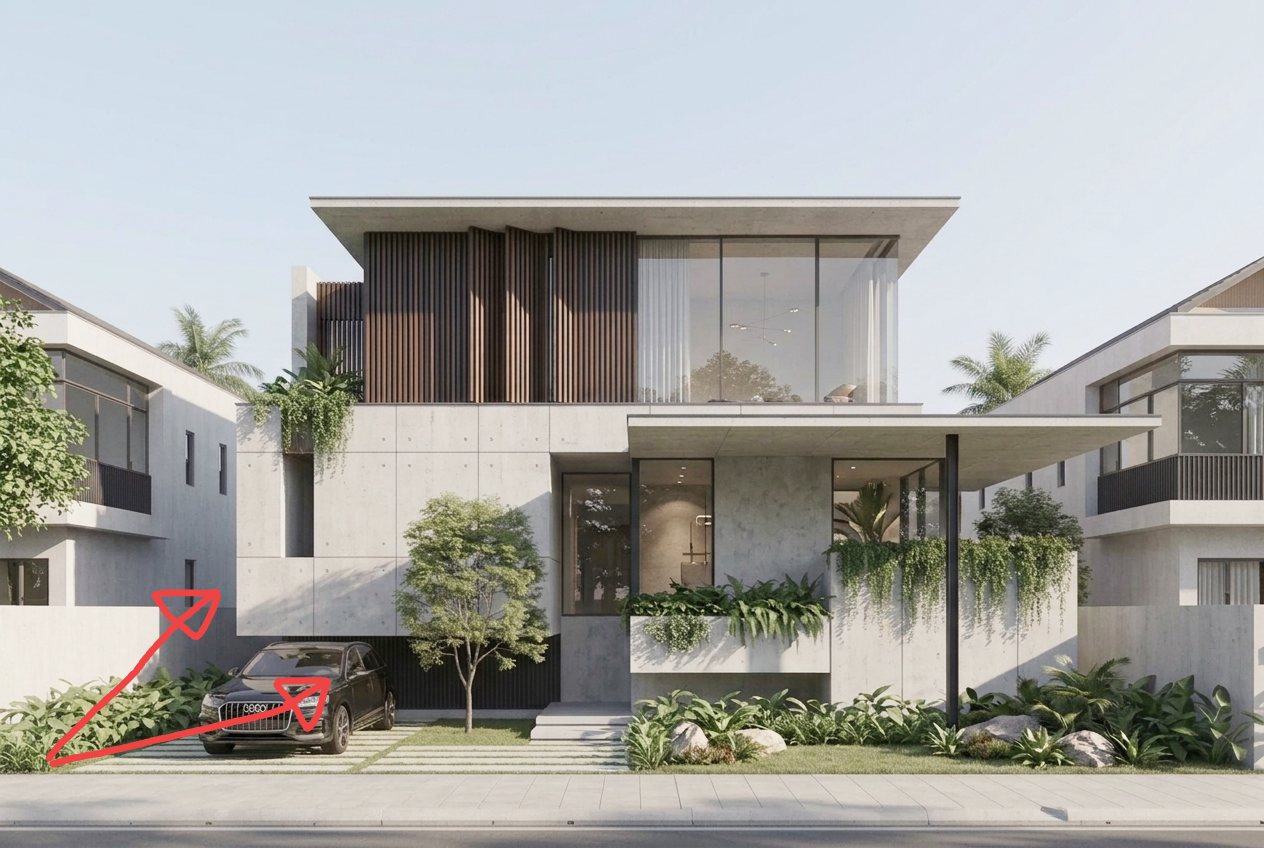
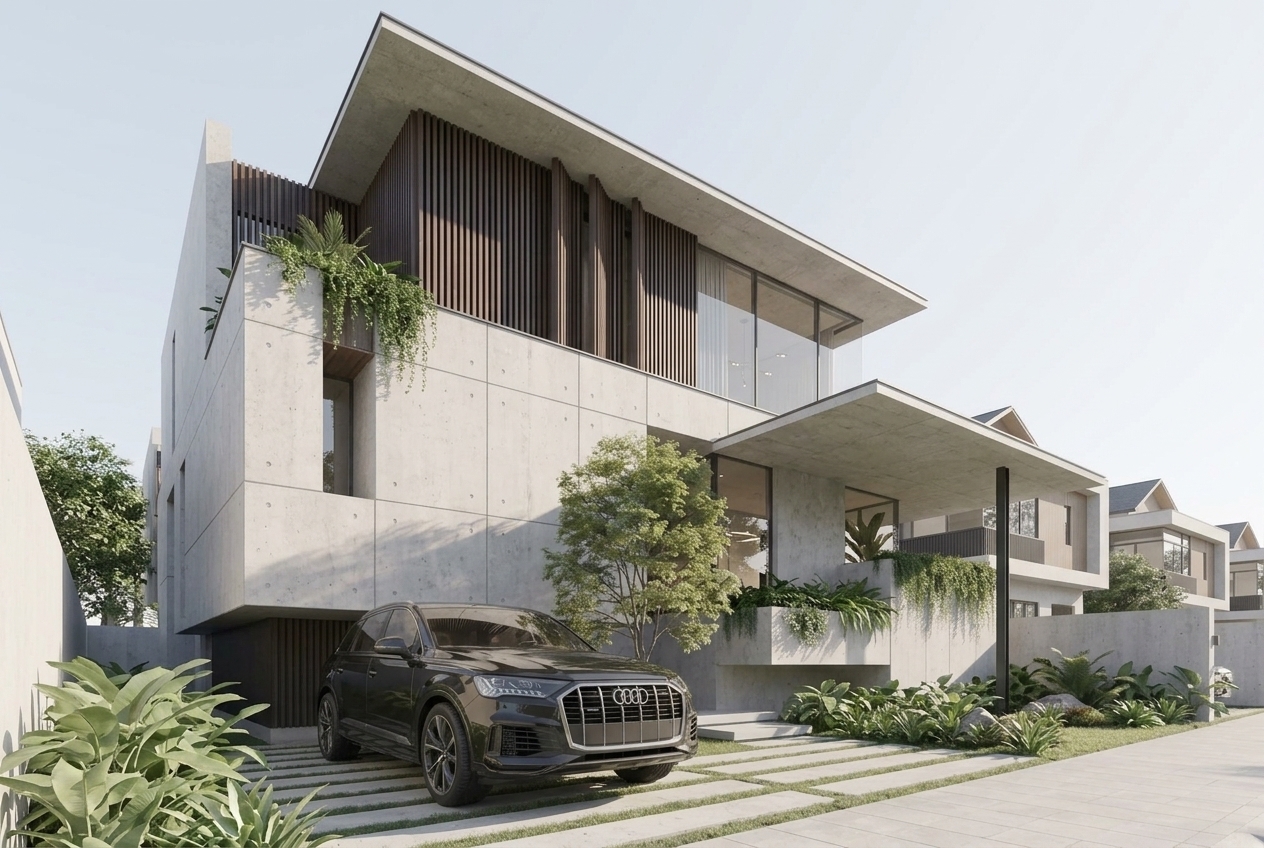 Figure 05. Using a red arrow to specify the desired architectural viewpoint
There is a trade-off here. The larger the viewpoint change, the more the AI has to infer unseen parts of the building. For this reason, we usually keep viewpoint changes within a reasonable angle instead of jumping from the front view to a completely unknown rear view.
Step 6 — Combine multiple references for material, lighting, and mood
Annotations are not limited to a single image. We also use multiple reference images to separate different design conditions.
For example, one image can define the original building geometry, another image can define the material texture, and a third image can define dusk lighting and atmosphere. This is usually more stable than putting every requirement into one image or one long prompt.
use image 1 as the main building geometry reference, image 2 as the material reference, and image 3 as the dusk lighting and atmosphere reference, preserve the original building form
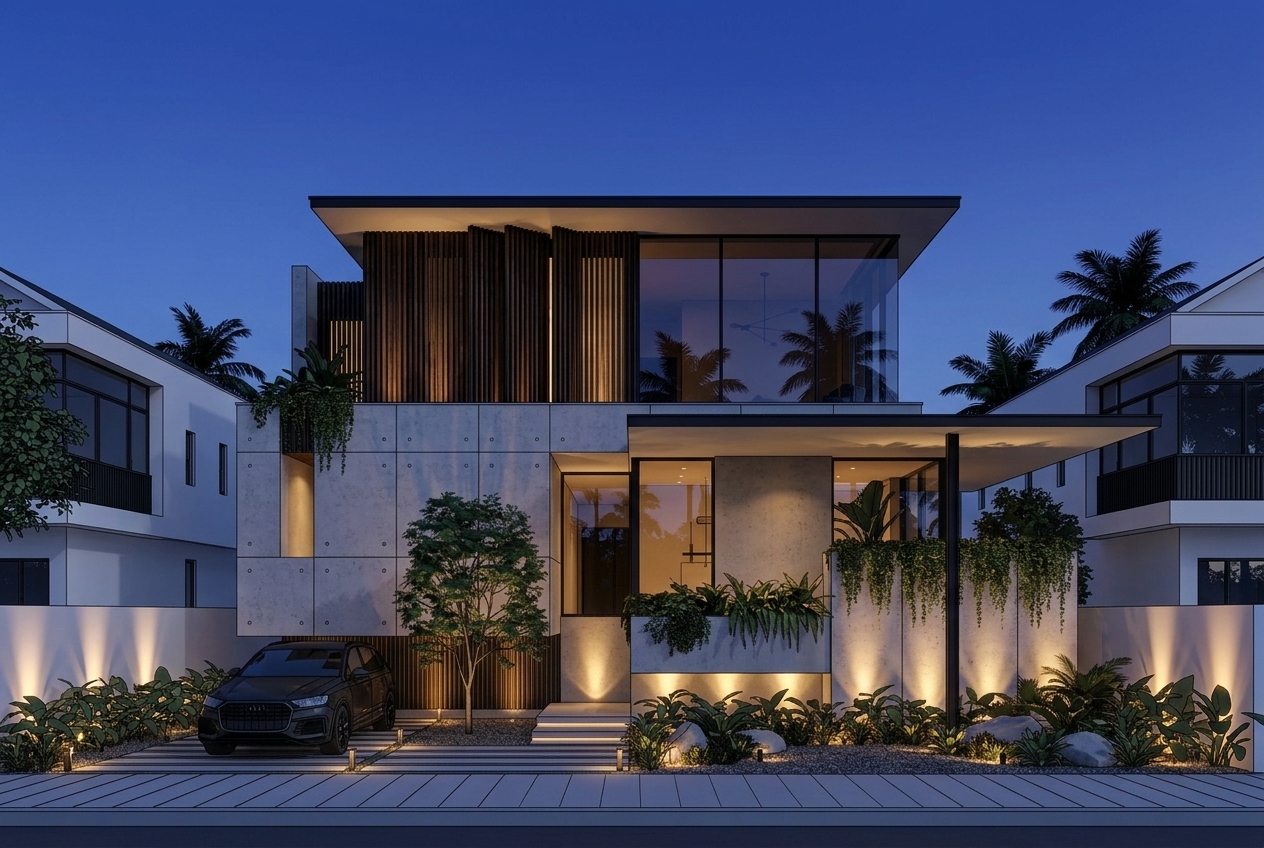
Figure 06. Using multiple references to separate geometry, materials, lighting, and atmosphere
This approach reduces the chance that the AI randomly changes the design. Each reference image has a clear role, so the model does not need to guess which image controls form, which one controls material, and which one controls mood.
What this workflow changes
This workflow helps designers communicate design intent to AI without writing an overly long prompt. Annotations turn instructions like “change this area,” “light comes from here,” and “view from this direction” into visual commands.
ReRender still requires manual review in annotation workflows. Designers should check whether the marked area was understood correctly, whether arrows were interpreted as intended, and whether materials, lighting, and viewpoints still make sense.
But for early-stage proposals, annotations can reduce prompt communication cost and help preserve geometry, perspective, and design language. Instead of asking AI to freely reinterpret the project, we can guide it visually and make the result closer to the original design intent.
Related posts
How to Create Realistic Lighting with Prompts
The same minimal scene can feel completely different when you change the lighting prompt.
Willy·Jul 9, 2026
How to Turn a 3D Clay Model into a Realistic Render
A realistic render is not created in one step. It is built layer by layer, from materials and context to lighting, fog, and final glow.
Willy·Jun 29, 2026
How to Create Figure-Ground Maps from Aerial Views
A messy aerial city image can become a clean, readable figure-ground map with the right prompt and edit workflow.
Willy·Jun 18, 2026