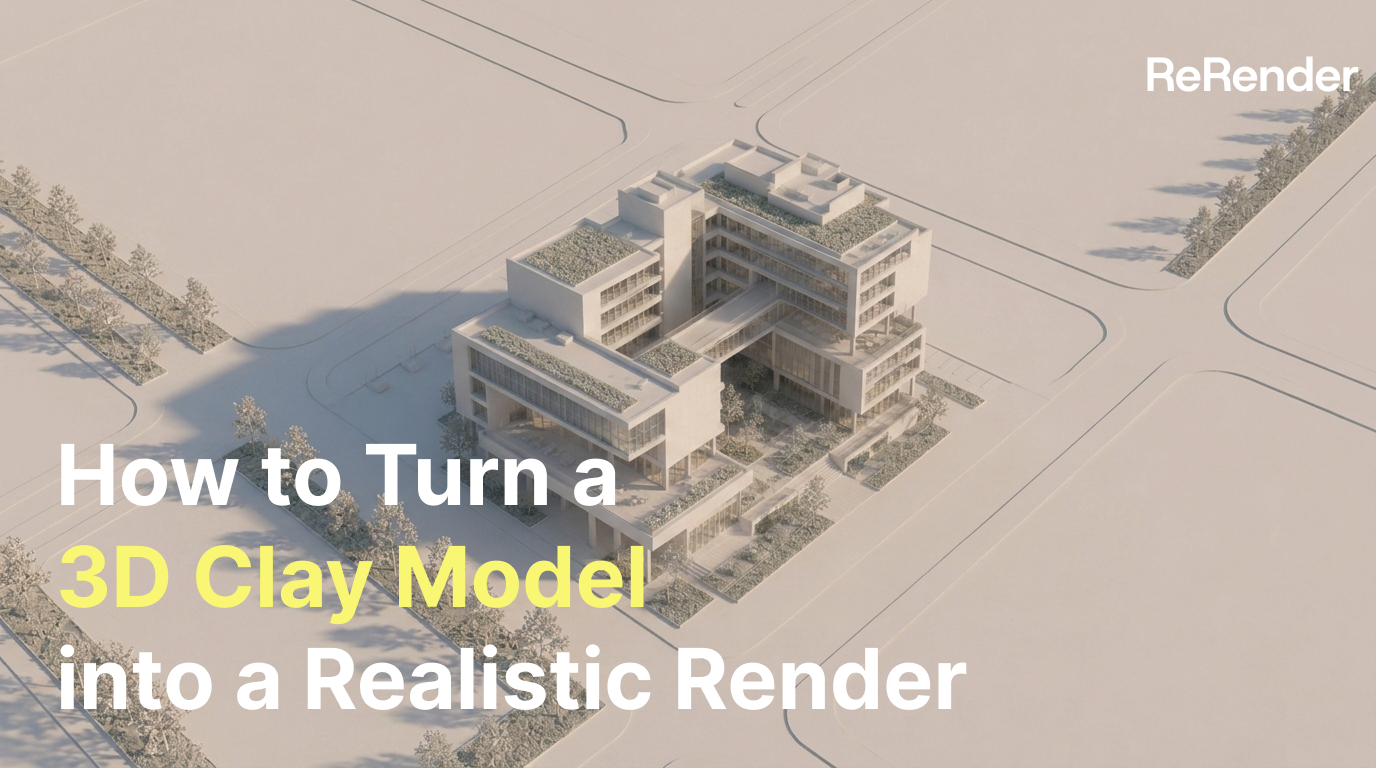
How to Turn a 3D Clay Model into a Realistic Render
Learn how to use ReRender AI Workbench to turn a simple 3D clay model into a realistic architectural rendering step by step.
Why start with a 3D clay model?
In architectural and spatial design workflows, a 3D clay model is often the fastest way to establish the design direction. It helps us check massing, proportions, openings, street relationships, and camera composition before moving into detailed rendering.
However, if we present the clay model directly, the image often feels too cold, too empty, and disconnected from a real-world setting.
In this tutorial, we’ll use ReRender AI Workbench to gradually turn a simple 3D clay model into a realistic architectural rendering. The goal is not to replace a full 3D rendering pipeline, but to help designers move faster from “model checking” to “scene communication” during early-stage proposals.
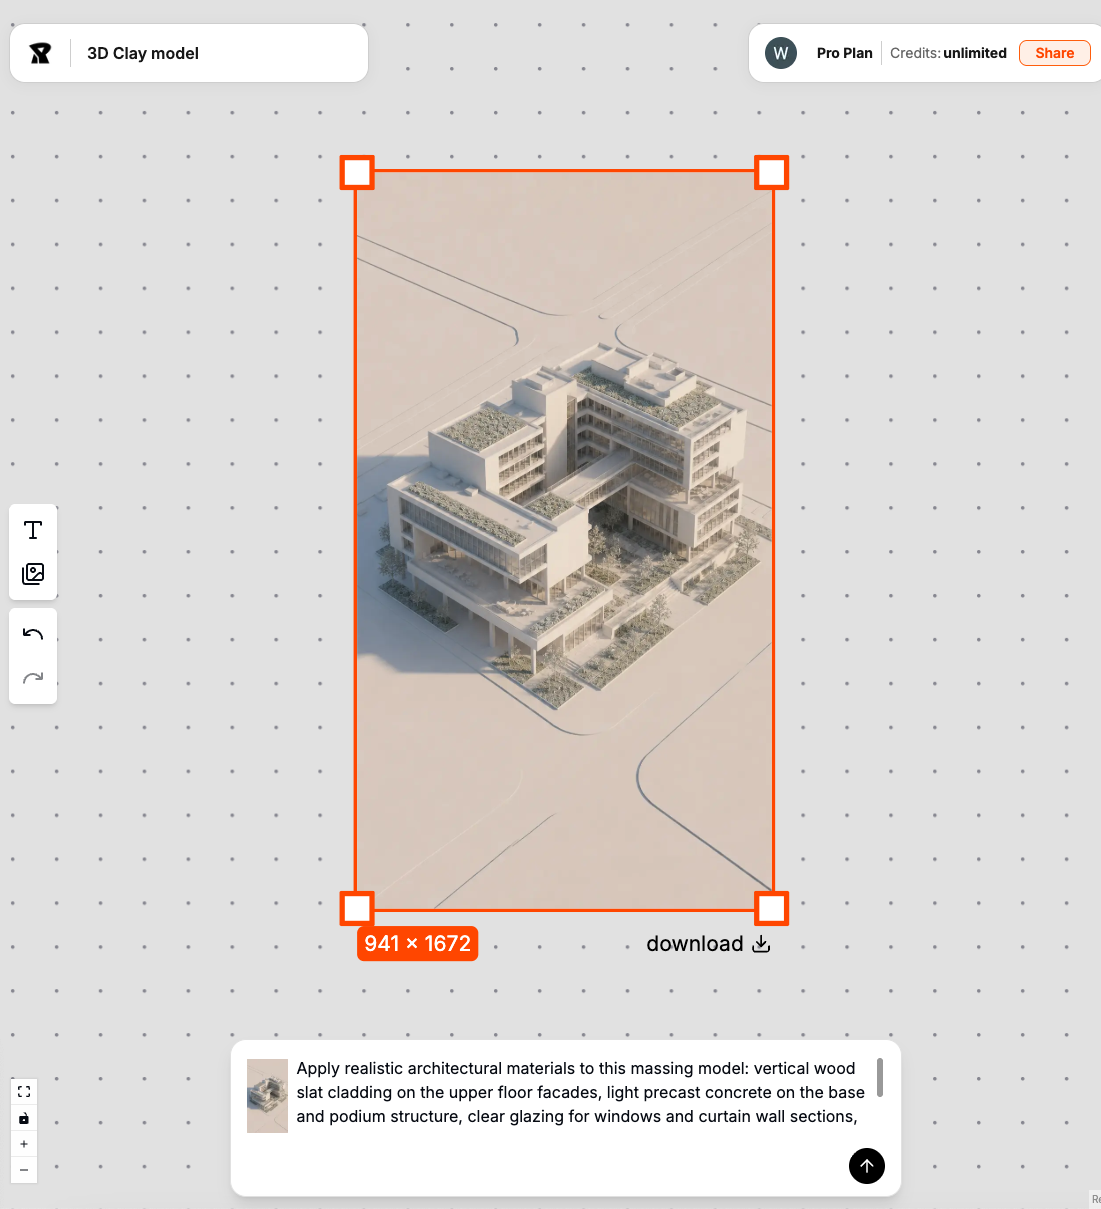
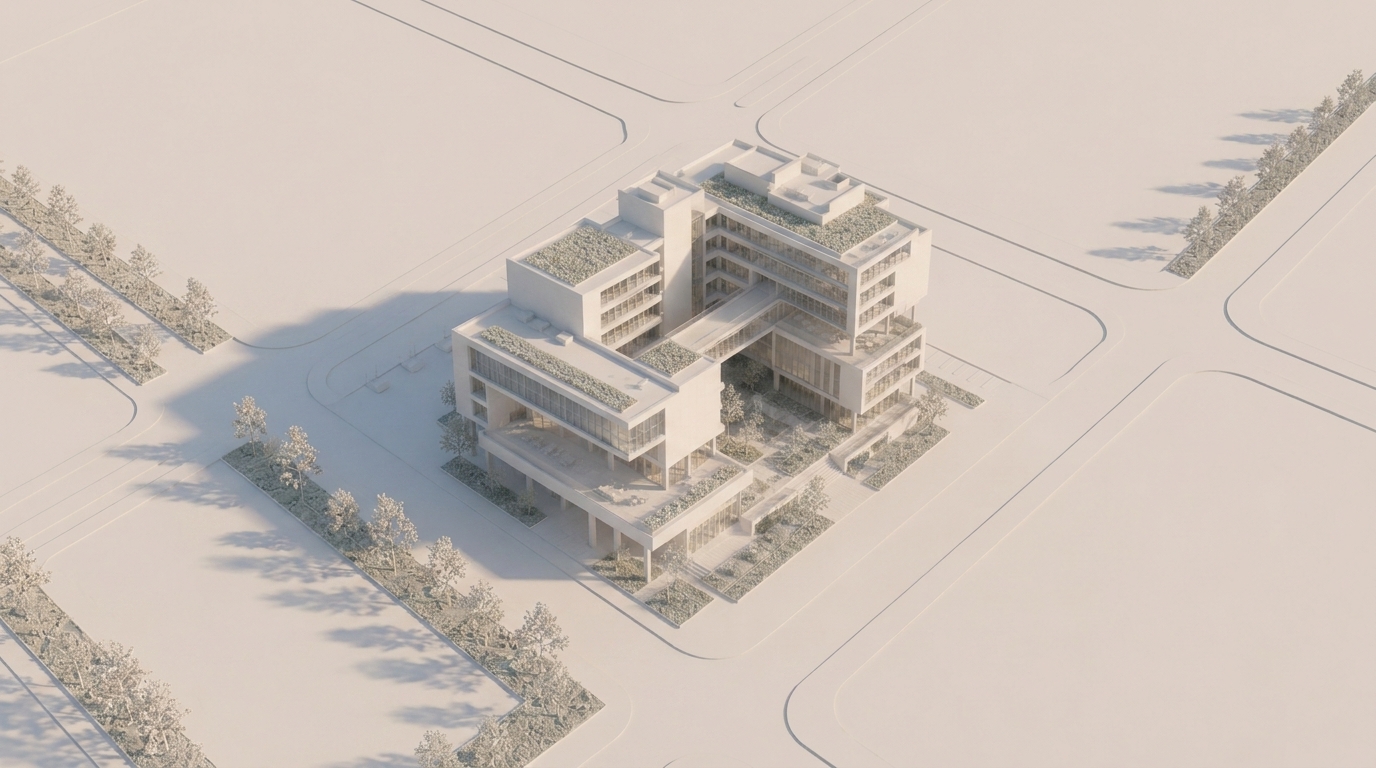 Figure 01. Starting from a basic 3D clay model to confirm building massing and composition
The key idea of this workflow is not to generate the final render in one step. Instead, we control the process layer by layer. Each step focuses on one specific problem, so the AI does not change the material, background, lighting, and atmosphere all at once.
Step 1 — Log in and open Workbench
First, log in to ReRender and open Workbench.
Workbench is useful when you want to develop an image step by step instead of generating one final result immediately. For this workflow, we use the 3D clay model as the base image, then keep editing it with prompts as the scene becomes more realistic.
After entering Workbench, upload your 3D clay model image. A clear input works best: the building shape, openings, camera angle, and surrounding ground plane should be easy to read.
Before writing the first prompt, check whether the original model already has a clear composition. If the model is too cropped or the camera angle is unclear, later edits may make the result less stable.
Step 2 — Preserve the structure and add materials
The first prompt should preserve the original massing and proportions. At this stage, we only want to turn the gray clay model into a building with basic architectural materials.
preserve the original 3D massing model, keep the building shape, openings, proportions, and camera angle, add realistic architectural materials, concrete facade, glass windows, metal details, clean modern design
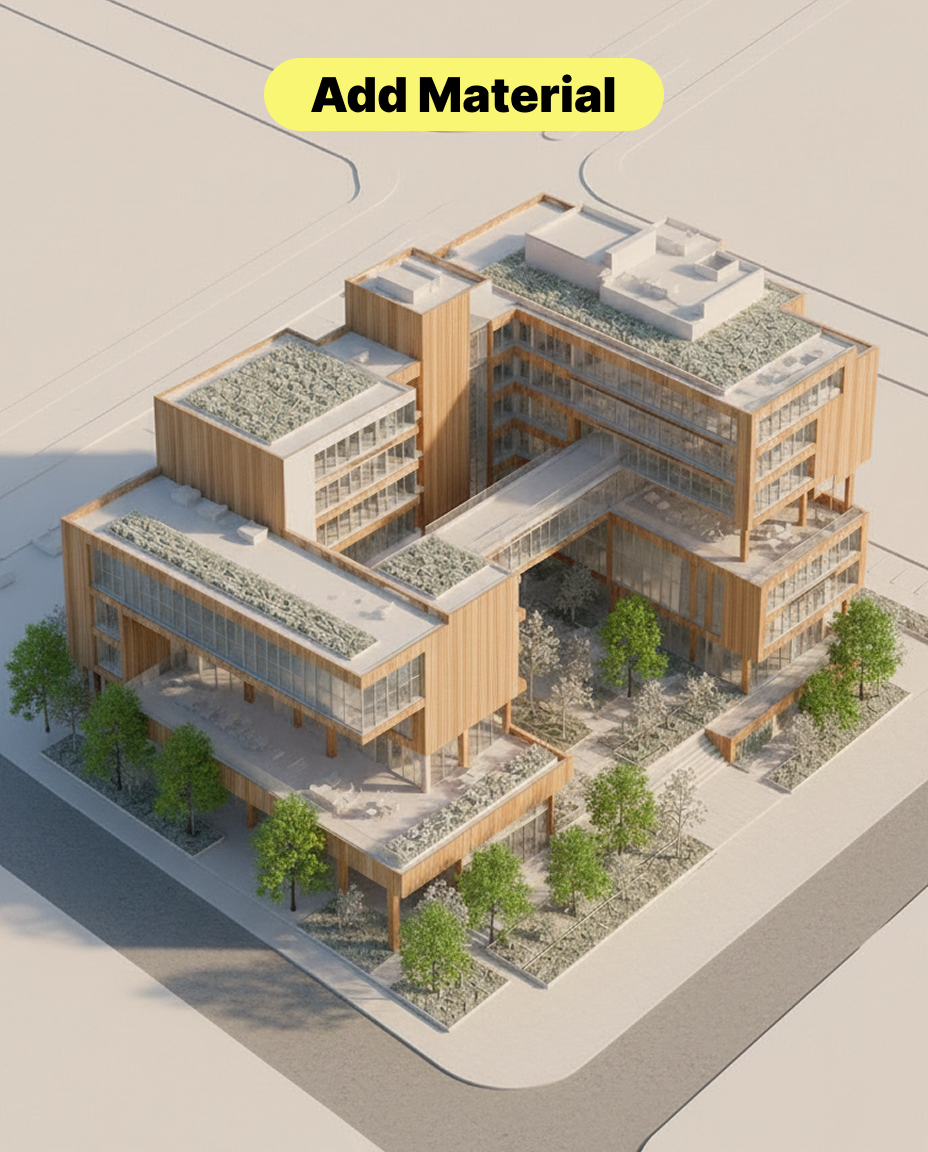 Figure 02. Adding architectural materials while preserving the original massing
In our tests, if we add too many words like realistic city, night scene, crowds, or cinematic atmosphere too early, the model may start redesigning the original building.
That is why the first prompt should focus on preserve massing, keep geometry, and add material, instead of asking for a final render immediately.
The main trade-off at this stage is that material quality should not override the design structure. Materials can make the image feel more realistic, but if they change the wall, windows, or proportions, the result becomes less useful for design review.
Step 3 — Add the urban context
Once the material layer is stable, the next step is to place the building back into a realistic context.
For architectural rendering, the background is not just decoration. It helps the building relate to the city, street, sky, landscape, and surrounding scale.
place the building into a realistic urban context, surrounding city street, sidewalk, trees, distant buildings, natural sky, preserve the original building design and camera angle
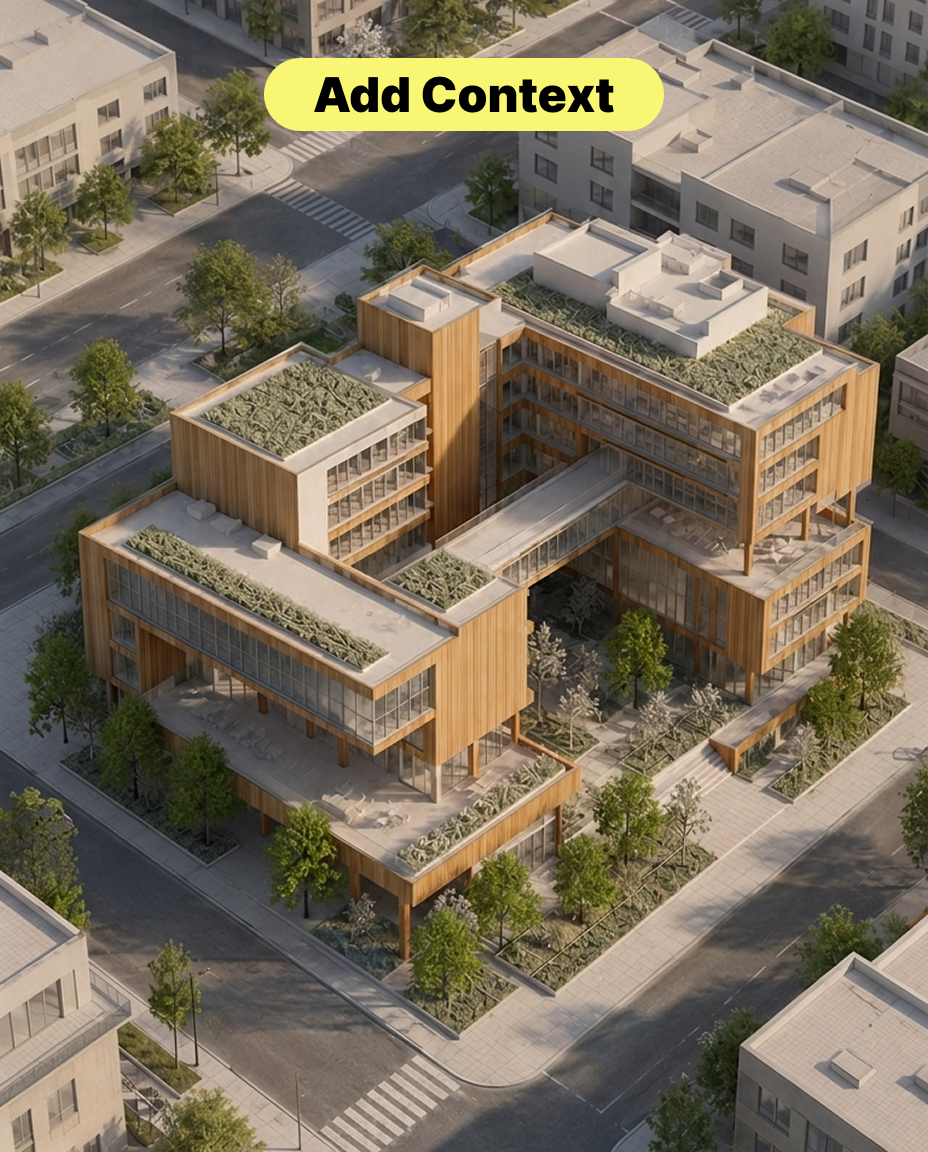 Figure 03. Placing the building into a realistic city context
At this stage, we still need to protect the original building design. The prompt should describe the context, but also clearly say preserve the original building design and camera angle.
If the context prompt is too strong, the AI may treat the building as part of a new scene and change its facade, height, or overall form.
Step 4 — Add people and cars for scale
After the building has materials and context, we can add people and cars to make the scene feel more alive.
People help viewers understand entrance height, sidewalk scale, and the relationship between the building and the street. Cars help clarify road width, foreground scale, and urban context.
add realistic pedestrians and a few cars, natural scale, street life, people walking on the sidewalk, vehicles on the road, do not block the main building facade
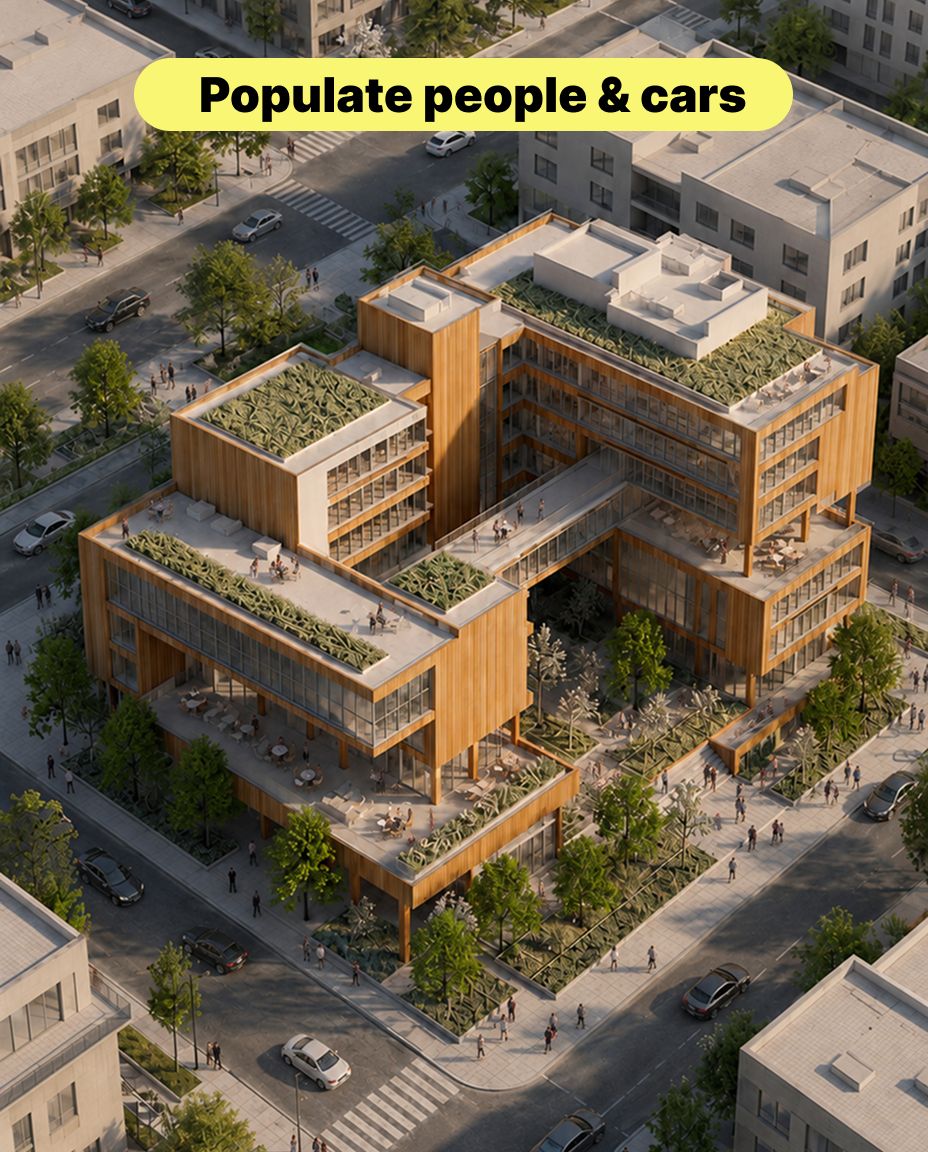 Figure 04. Adding people and cars to create scale and everyday life
The most common issue here is that people or cars may block the main building facade. To reduce that risk, we include instructions such as do not block the main building facade and natural scale.
The goal is not to make people and cars the focus of the image. They should support the architectural scene and make the space easier to understand.
Step 5 — Add lighting and atmosphere
Once the basic scene is complete, we begin adjusting the lighting.
Lighting is not just about making the image brighter. It controls visual focus, facade depth, material readability, and the overall mood of the scene.
add warm architectural lighting, soft interior glow, realistic shadows, balanced exposure, evening atmosphere, preserve facade details
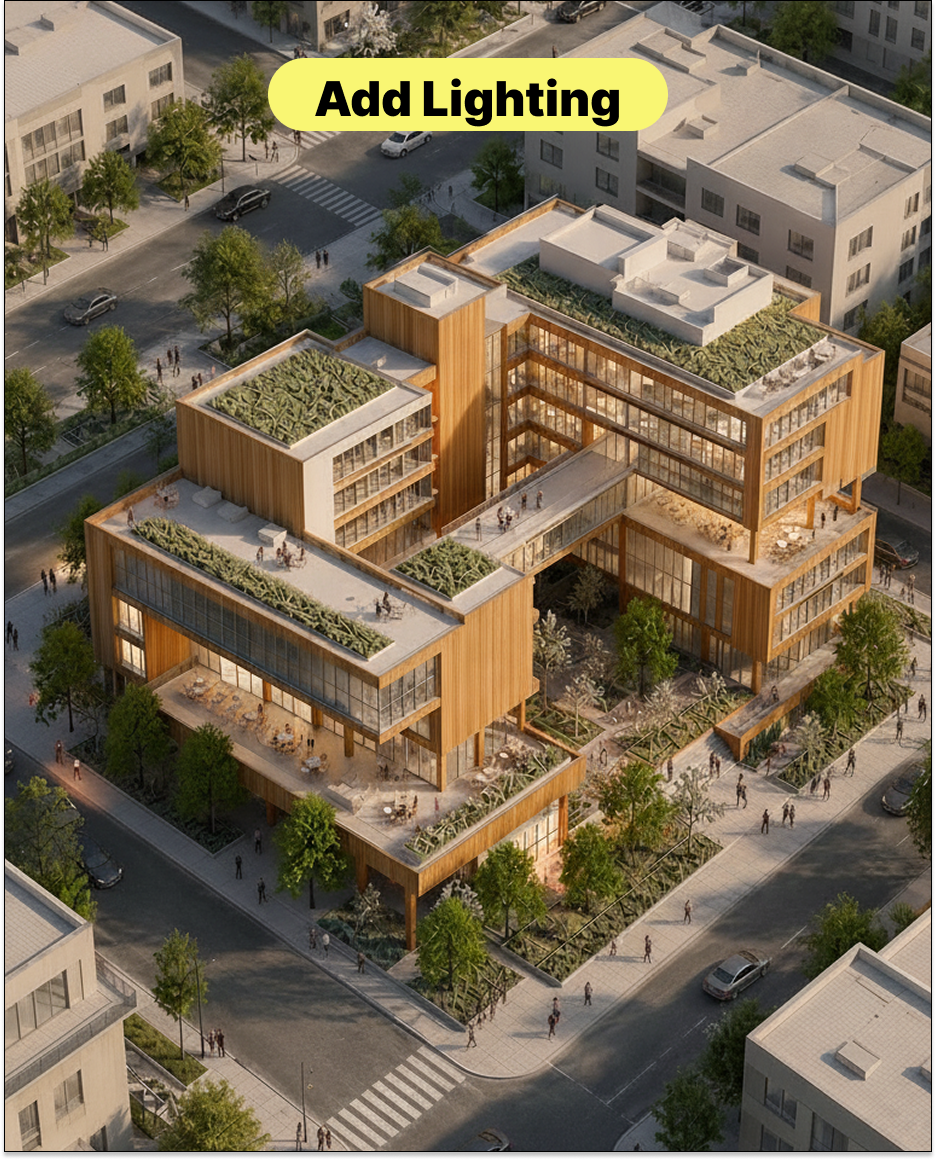 Figure 05. Using lighting to strengthen facade depth and atmosphere
After lighting, we can add a subtle fog or haze effect to create more spatial depth between the foreground, middle ground, and background.
add subtle atmospheric fog, soft depth, slight haze in the background, preserve building clarity, realistic urban atmosphere
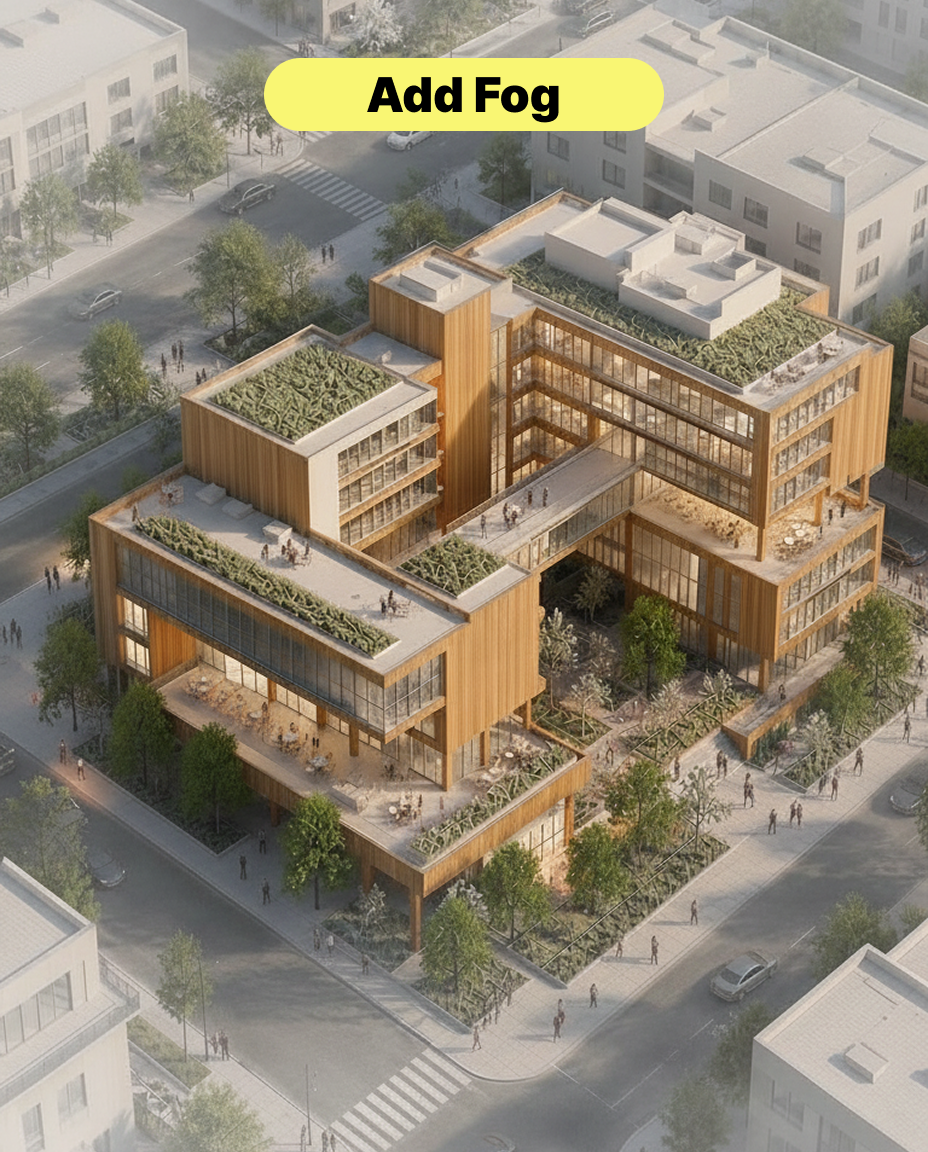 Figure 06. Subtle fog helps separate foreground, middle ground, and background
This step can easily become too heavy. If the fog is too strong, the building details disappear. If it is too weak, the scene may still feel flat.
We usually use subtle atmospheric fog instead of heavy fog or dramatic haze. This adds depth while keeping the building readable.
Step 6 — Add final glow and bloom
The final step is to add a subtle glow or bloom effect.
This helps windows, light strips, streetlights, and reflective surfaces feel closer to a finished architectural visualization. We usually add this layer at the end because it behaves more like post-processing than design development.
add subtle glow effect, soft bloom on lights and windows, realistic final render, cinematic but natural, high-quality architectural visualization
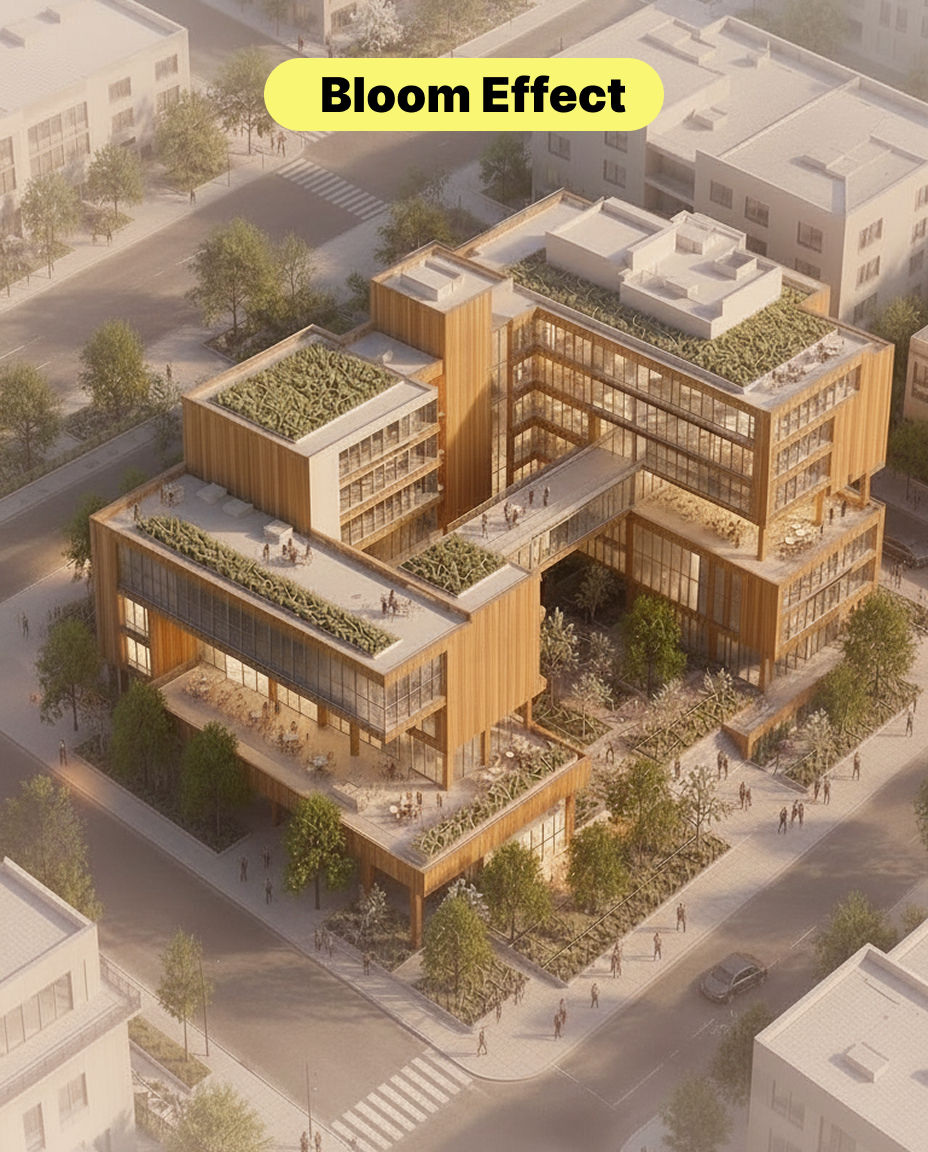 Figure 07. Adding final glow after materials, context, and lighting are stable
One issue we encountered is that if glow is added too early, the AI may treat lighting as the main design feature. It may even change window proportions or facade details.
For that reason, we only add glow after the massing, materials, context, and lighting have already become stable.
What this workflow changes
This workflow can turn a simple 3D clay model into a realistic architectural rendering step by step.
Each layer answers a different question: materials give the building texture, context gives it location, people and cars create scale, lighting creates mood, fog creates depth, and glow gives the final image a more polished rendering quality.
ReRender AI still requires manual review for this kind of transformation. Designers should check whether the building massing has changed, whether the materials are reasonable, whether people and cars have natural scale, and whether lighting hides important design details.
But for early-stage proposals, this workflow helps designers move faster from a simple clay model to a scene that can actually be felt, discussed, and presented.
Related posts
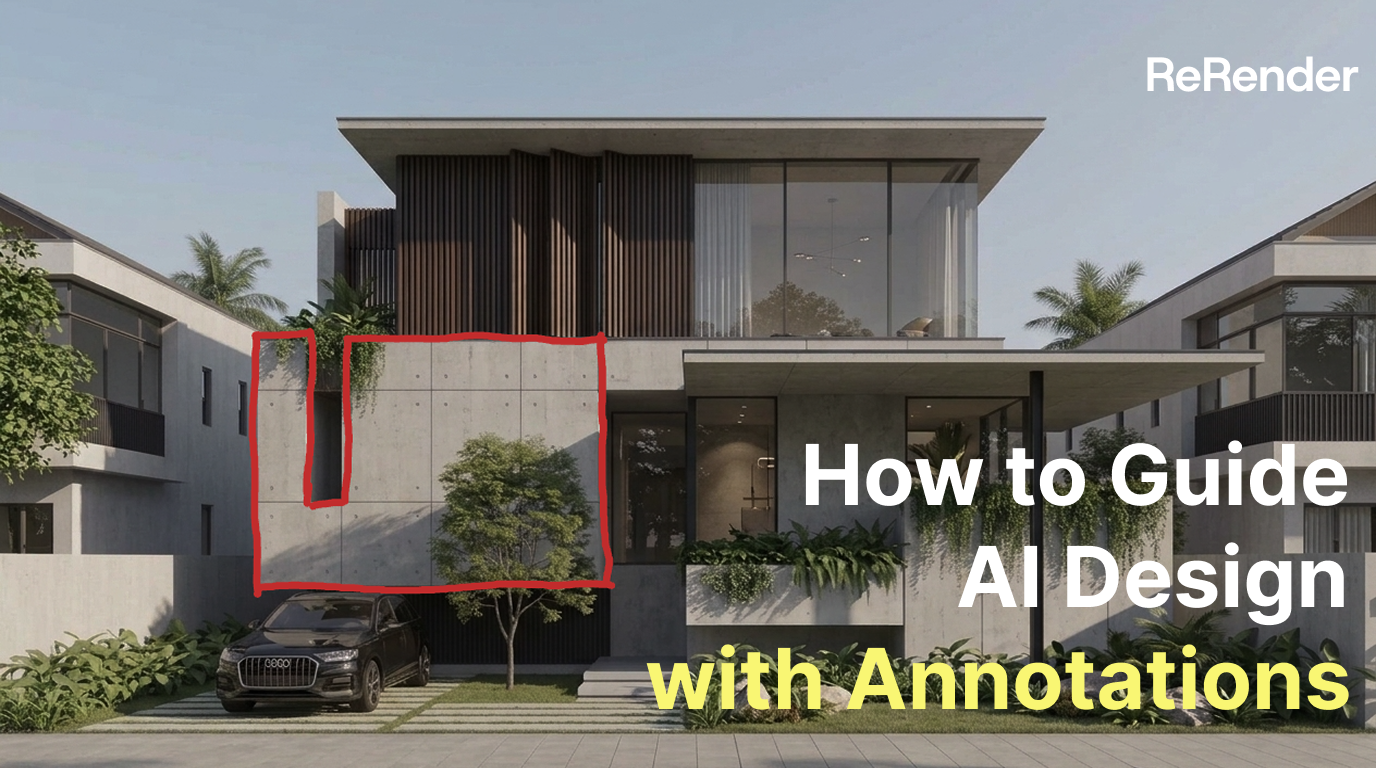
How to Guide AI Design with Annotations
Sometimes drawing directly on the image is more accurate than writing a longer prompt.
Willy·Jul 16, 2026
How to Create Realistic Lighting with Prompts
The same minimal scene can feel completely different when you change the lighting prompt.
Willy·Jul 9, 2026
How to Create Figure-Ground Maps from Aerial Views
A messy aerial city image can become a clean, readable figure-ground map with the right prompt and edit workflow.
Willy·Jun 18, 2026